A love for the game. A place to grow. Free home training hub →
Training hub · Strength

Bodyweight strength.

Football-specific strength you can do anywhere: legs, hips, core and upper body. No gym needed.

Age
Focus

Always warm up first. Younger players (5–8) build fitness best through play — keep things short, fun and varied. Stop any exercise that causes pain.
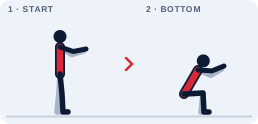
Illustration showing how to do squat
Legs

Squat

5–89–1112–1415+

The foundation movement for jumping, landing and shooting power.

5 minSolo
Equipment
  • Chair (for younger players) Any sturdy chair, sofa or bottom stair to sit back to
How to do it

Steps

  1. Feet shoulder-width, toes slightly out, arms forward.
  2. Sit back and down as if sitting onto a chair.
  3. Go as low as you can while keeping your heels down and chest up.
  4. Push through the whole foot to stand tall.

Coaching points

  • Knees follow your toes.
  • Heels stay on the floor.
  • Slow down, fast up.

How much, by age

  • 5–82 × 8 'sit to stand' from a chair
  • 9–113 × 10
  • 12–143 × 12–15
  • 15+3 × 15–20, or slow 3-second lowering
EasierSit to a chair and stand up again.
HarderPause at the bottom for 2 seconds, or move on to goblet squats.
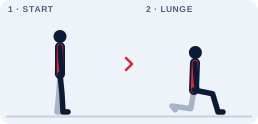
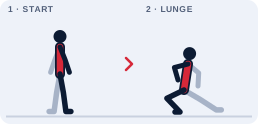
Illustration showing how to do reverse lunge
Legs

Reverse lunge

9–1112–1415+

Single-leg strength and balance for running, turning and striking.

5 minSolo
EquipmentNone needed — just space to move.
How to do it

Steps

  1. Stand tall, feet hip-width.
  2. Step back with one leg and lower until both knees are bent to about 90°.
  3. Front knee stays over the ankle; back knee hovers above the floor.
  4. Push through the front foot to return. Switch legs.

Coaching points

  • Chest up.
  • Front knee in line with toes.
  • Control the way down.

How much, by age

  • 9–112 × 6 each leg
  • 12–143 × 8 each leg
  • 15+3 × 10–12 each leg
EasierHold a wall or chair.
HarderWalking lunges, or add light weights.
Illustration showing how to do side lunge
Legs & groin

Side lunge

9–1112–1415+

Strengthens the inner thigh and hips – key for side-steps and protecting the groin.

5 minSolo
EquipmentNone needed — just space to move.
How to do it

Steps

  1. Stand with feet wide.
  2. Shift your weight to one side, bending that knee and sitting the hips back.
  3. Keep the other leg straight with the foot flat.
  4. Push back to the middle and switch sides.

Coaching points

  • Hips back, chest up.
  • Bent knee follows the toes.
  • Feel the stretch in the straight leg's inner thigh.

How much, by age

  • 9–112 × 6 each side
  • 12–143 × 8 each side
  • 15+3 × 10 each side
EasierSmaller range of movement.
HarderHold a light weight at your chest.
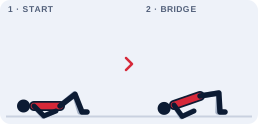
Illustration showing how to do glute bridge
Hips & glutes

Glute bridge

5–89–1112–1415+

Strong glutes protect the hamstrings and lower back and power your sprint.

5 minSolo
Equipment
  • Mat (optional) A towel, rug or soft grass
How to do it

Steps

  1. Lie on your back, knees bent, feet flat and hip-width apart.
  2. Squeeze your bum and lift your hips until your body is straight from shoulders to knees.
  3. Hold for 2 seconds at the top.
  4. Lower slowly.

Coaching points

  • Push through your heels.
  • Don't arch your back – squeeze the glutes.
  • Ribs down.

How much, by age

  • 5–82 × 8 'make a bridge'
  • 9–113 × 10
  • 12–143 × 12, 2 s hold
  • 15+3 × 15 or single-leg
EasierSmaller lift.
HarderSingle-leg bridge, or feet on a step.
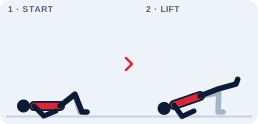
Illustration showing how to do single-leg bridge
Hips & hamstrings

Single-leg bridge

9–1112–1415+

A harder bridge that builds hamstring and glute strength one side at a time.

5 minSolo
Equipment
  • Mat (optional) A towel, rug or soft grass
How to do it

Steps

  1. Lie on your back, one foot on the floor, other leg straight.
  2. Lift your hips using the planted leg.
  3. Keep the hips level – don't let one side drop.
  4. Lower slowly and repeat, then switch.

Coaching points

  • Hips level.
  • Drive through the heel.
  • Slow lowering.

How much, by age

  • 9–112 × 6 each leg
  • 12–143 × 8 each leg
  • 15+3 × 10–12 each leg
EasierTwo-leg bridge.
HarderFoot up on a step or sofa.
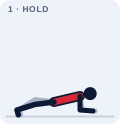
Illustration showing how to do plank
Core

Plank

5–89–1112–1415+

Core strength helps you hold off opponents and keep your balance.

3 minSolo
Equipment
  • Mat (optional) A towel, rug or soft grass
How to do it

Steps

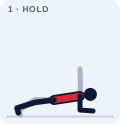
  1. Rest on your forearms with elbows under your shoulders.
  2. Step your feet back so your body is in a straight line.
  3. Squeeze your bum and tummy.
  4. Hold, breathing normally.

Coaching points

  • Straight line from head to heels.
  • Don't let the hips sag or pike up.
  • Quality over time – stop when the shape goes.

How much, by age

  • 5–83 × 10 s (on knees is fine)
  • 9–113 × 20 s
  • 12–143 × 30 s
  • 15+3 × 45–60 s
EasierPlank on your knees.
HarderLift one foot or one arm for a few seconds.
Illustration showing how to do side plank
Core

Side plank

9–1112–1415+

Strengthens the sides of the trunk and hips for stability when changing direction.

3 minSolo
Equipment
  • Mat (optional) A towel, rug or soft grass
How to do it

Steps

  1. Lie on your side, elbow under your shoulder, feet stacked.
  2. Lift your hips so your body is straight.
  3. Reach your top arm to the sky.
  4. Hold, then switch sides.

Coaching points

  • Hips high and forward.
  • Head in line with the body.
  • Breathe.

How much, by age

  • 9–112 × 15 s each side
  • 12–143 × 20 s each side
  • 15+3 × 30–40 s each side
EasierBottom knee on the floor.
HarderLift the top leg.
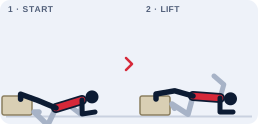
Illustration showing how to do incline push-up
Upper body

Incline push-up

5–89–1112–14

The best way to build up to a full push-up with great form.

5 minSolo
Equipment
  • Step, bench or table A sofa edge, a sturdy table or a wall
How to do it

Steps

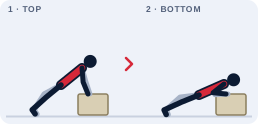
  1. Place your hands on a step or bench, slightly wider than shoulders.
  2. Walk your feet back so your body is straight.
  3. Lower your chest towards the edge.
  4. Push back up.

Coaching points

  • Body straight like a plank.
  • Elbows at about 45° from your body.
  • Full range.

How much, by age

  • 5–82 × 5 against a wall
  • 9–113 × 8
  • 12–143 × 10–12
EasierPush up against a wall.
HarderUse a lower step, then move to the floor.
Illustration showing how to do push-up
Upper body

Push-up

9–1112–1415+

Upper-body strength for shielding, throw-ins and getting up quickly.

5 minSolo
EquipmentNone needed — just space to move.
How to do it

Steps

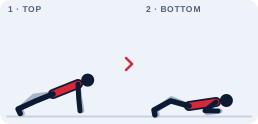
  1. Hands slightly wider than shoulders, body straight.
  2. Lower your chest towards the floor.
  3. Push back up to straight arms.
  4. Keep your core tight throughout.

Coaching points

  • Hips in line.
  • Chest leads, not the head.
  • Elbows angled back, not flared.

How much, by age

  • 9–113 × 5 (knees allowed)
  • 12–143 × 8–10
  • 15+3 × 12–20
EasierIncline or knee push-ups.
HarderSlow 3-second lowering, or feet raised.
Illustration showing how to do superman
Back & glutes

Superman

5–89–1112–1415+

Strengthens the back and glutes to balance out all the forward bending in football.

3 minSolo
Equipment
  • Mat (optional) A towel, rug or soft grass
How to do it

Steps

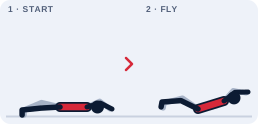
  1. Lie on your front, arms stretched forwards.
  2. Lift your arms, chest and legs a little off the floor.
  3. Hold for 2–3 seconds.
  4. Lower slowly.

Coaching points

  • Look at the floor to keep the neck long.
  • Small lift – no need to arch hard.
  • Squeeze your bum.

How much, by age

  • 5–82 × 6 'fly like a superhero'
  • 9–113 × 8
  • 12–143 × 10
  • 15+3 × 12 with 3 s holds
EasierLift arms only, then legs only.
HarderOpposite arm and leg, longer holds.
Illustration showing how to do dead bug
Core

Dead bug

9–1112–1415+

Teaches the core to stay strong while arms and legs move – just like in a game.

3 minSolo
Equipment
  • Mat (optional) A towel, rug or soft grass
How to do it

Steps

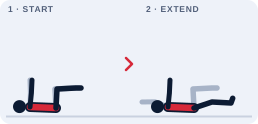
  1. Lie on your back with arms pointing to the ceiling and knees bent at 90° above your hips.
  2. Press your lower back gently into the floor.
  3. Slowly straighten one leg and lower the opposite arm overhead.
  4. Return and switch sides.

Coaching points

  • Lower back stays down.
  • Move slowly.
  • Breathe out as you extend.

How much, by age

  • 9–112 × 6 each side
  • 12–143 × 8 each side
  • 15+3 × 10 each side
EasierMove just the legs.
HarderHold a football between hand and knee on the other side.
Illustration showing how to do calf raises
Lower legs

Calf raises

5–89–1112–1415+

Strong calves help sprinting, jumping and protect the Achilles.

3 minSolo
Equipment
  • Low step or box The bottom stair, a sturdy low bench or a kerb – never anything that can tip or slide
How to do it

Steps

  1. Stand tall, holding a wall for balance.
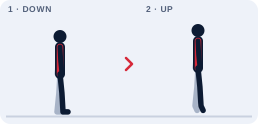
  2. Rise up onto your toes as high as you can.
  3. Pause at the top.
  4. Lower slowly.

Coaching points

  • Up fast, down slow.
  • Stay over the big toe.
  • Full range.

How much, by age

  • 5–82 × 10
  • 9–113 × 12
  • 12–143 × 15, or single-leg
  • 15+3 × 15–20 single-leg on a step
EasierBoth legs, holding on.
HarderSingle-leg on the edge of a step.
Illustration showing how to do wall sit
Legs

Wall sit

5–89–1112–1415+

Builds leg strength and endurance with no equipment.

3 minSolo
Equipment
  • Wall Any solid wall or fence
How to do it

Steps

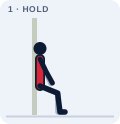
  1. Lean your back against a wall.
  2. Slide down until your knees are bent (90° for older players, less for younger).
  3. Hold the position.
  4. Stand up by sliding back up the wall.

Coaching points

  • Knees over ankles.
  • Back flat on the wall.
  • Breathe.

How much, by age

  • 5–83 × 10 s, higher position
  • 9–113 × 20 s
  • 12–143 × 30 s
  • 15+3 × 45–60 s
EasierDon't go as low.
HarderHold a ball between your knees, or lift one heel.
Illustration showing how to do mountain climbers
Core & fitness

Mountain climbers

9–1112–1415+

Core strength and fitness in one move.

3 minSolo
EquipmentNone needed — just space to move.
How to do it

Steps

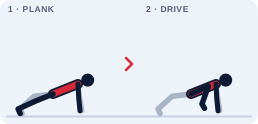
  1. Start in a high plank, hands under shoulders.
  2. Drive one knee towards your chest.
  3. Switch legs quickly, like running.
  4. Keep your hips low and steady.

Coaching points

  • Hands under shoulders.
  • Hips stay level.
  • Quality first, then speed.

How much, by age

  • 9–113 × 15 s
  • 12–143 × 20 s
  • 15+4 × 30 s
EasierSlow, one knee at a time.
HarderHands on a ball.
Illustration showing how to do squat jumps
Power

Squat jumps

9–1112–1415+

Explosive power for jumping, sprinting and shooting.

3 minSolo
EquipmentNone needed — just space to move.
How to do it

Steps

  1. Feet shoulder-width.
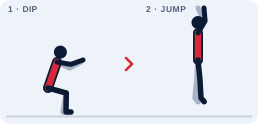
  2. Dip into a half squat with arms back.
  3. Jump as high as you can, swinging your arms up.
  4. Land softly back into a half squat. Reset and repeat.

Coaching points

  • Land quietly.
  • Knees out over toes on landing.
  • Reset between reps – quality not speed.

How much, by age

  • 9–112 × 5
  • 12–143 × 6
  • 15+3 × 8
EasierCalf-raise jumps (small).
HarderJump onto a low, stable step.
Illustration showing how to do step-ups
Legs

Step-ups

9–1112–1415+

Single-leg strength that carries straight over to running and jumping.

5 minSolo
Equipment
  • Low step or box The bottom stair, a sturdy low bench or a kerb – never anything that can tip or slide
How to do it

Steps

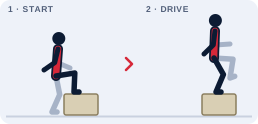
  1. Place one foot fully on a stable step.
  2. Drive through that foot to stand up on the step.
  3. Bring the other knee up.
  4. Step down with control. Do all reps, then switch.

Coaching points

  • Push through the top foot – don't push off the bottom one.
  • Stay tall.
  • Knee in line with toes.

How much, by age

  • 9–112 × 6 each leg
  • 12–143 × 8 each leg
  • 15+3 × 10 each leg
EasierUse a lower step.
HarderHold light weights.
Illustration showing how to do rear-foot elevated split squat
Legs

Rear-foot elevated split squat

12–1415+

A tough single-leg exercise for strength and hip mobility.

5 minSolo
Equipment
  • Bench A sofa edge, a sturdy chair against a wall, or the bottom stair
How to do it

Steps

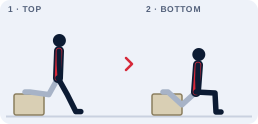
  1. Stand in front of a bench with your back foot resting on it.
  2. Lower straight down until the back knee nearly touches the floor.
  3. Front knee over the foot.
  4. Push up through the front heel.

Coaching points

  • Torso tall or leaning slightly forward.
  • Control the descent.
  • Front foot far enough forward.

How much, by age

  • 12–142 × 6 each leg
  • 15+3 × 8–10 each leg
EasierBack foot on the floor (split squat).
HarderHold light weights.
Illustration showing how to do single-leg reach (rdl)
Hamstrings & balance

Single-leg reach (RDL)

9–1112–1415+

Balance, hamstring strength and hip control on one leg.

5 minSolo
EquipmentNone needed — just space to move.
How to do it

Steps

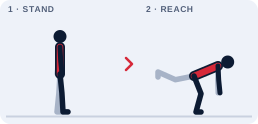
  1. Stand on one leg with a soft knee.
  2. Hinge at the hips, reaching your hands towards the floor as the other leg goes back.
  3. Keep your back flat and hips level.
  4. Return to standing.

Coaching points

  • Hips square to the floor.
  • Back leg in line with your body.
  • Slow and controlled.

How much, by age

  • 9–112 × 5 each leg
  • 12–143 × 6 each leg
  • 15+3 × 8 each leg
EasierTouch a wall for balance.
HarderHold a light weight in the opposite hand.
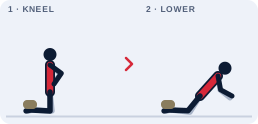
Illustration showing how to do nordic hamstring lower
Injury prevention

Nordic hamstring lower

12–1415+

Strongly linked with fewer hamstring injuries in footballers. Start very easy.

5 minPairs
Equipment
  • Partner to hold ankles Hook your heels under a heavy sofa, or ask an adult to hold your ankles
  • Mat (optional) A towel, rug or soft grass
How to do it

Steps

  1. Kneel with your ankles held firmly.
  2. Keeping hips straight, lower your body forwards as slowly as you can.
  3. Catch yourself with your hands.
  4. Push back up with your hands. Repeat.

Coaching points

  • Straight line from knees to head.
  • Fight the fall for as long as possible.
  • Expect sore hamstrings at first – build up slowly.

How much, by age

  • 12–141–2 × 3, partial range
  • 15+2–3 × 4–6
EasierOnly lower a short way.
HarderLower further and slower.

Safety: Build up gradually over several weeks.

Illustration showing how to do copenhagen plank (short)
Injury prevention

Copenhagen plank (short)

12–1415+

Groin-strengthening side plank, linked with fewer groin problems in football.

3 minSolo
Equipment
  • Bench A sofa edge, a sturdy chair against a wall, or the bottom stair
  • Mat (optional) A towel, rug or soft grass
How to do it

Steps

  1. Lie on your side with your top knee resting on a bench or sofa.
  2. Lift your hips so your body is straight, supported by your forearm and top knee.
  3. Lift the bottom leg towards the bench.
  4. Hold, then lower and switch sides.

Coaching points

  • Hips forward and up.
  • Start with the knee version.
  • Gentle progress – groins can be sensitive.

How much, by age

  • 12–142 × 10 s each side
  • 15+3 × 15–30 s each side
EasierBottom foot stays on the floor.
HarderTop foot (not knee) on the bench.
Want a plan for your player?

Get personal guidance.

Tell us your player's age and goals and we'll point you to the right sessions.